Help: Projects
What are Projects?
Color Hints Projects are a convient way to collect your thoughts on color based project. A Project can be used to organize
- A Project name and comment (if desired)
- Reference photographs
- Notes about the project
- Relevant Palettes
- Relevant Swatches
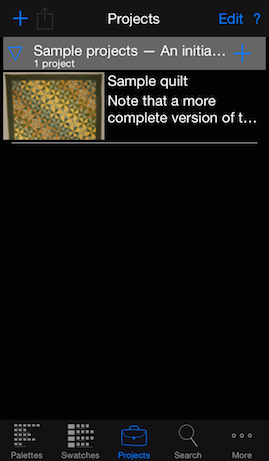
The Projects tab
From the Projects tab, the following can be done:
Creating or editing Project Collections
Click the + button in the tool bar (upper left) to create a new collection of Projects.
A Project Collection must have a name. Without a name the Project Collection will not be created.
The Project Collection can be protected from accidental deletion by turning off the "Collection can be deleted" switch

Creating or editing a Project Collection
Creating or editing a Project
Click the + button in the Project collection header to add a Project to the collection. Or, an existing Project can be double tapped to begin editing.
Finish editing a Project by tapping the Done button. At any time the Revert button can be tapped to discard all changes since editing began.
Editing a Project
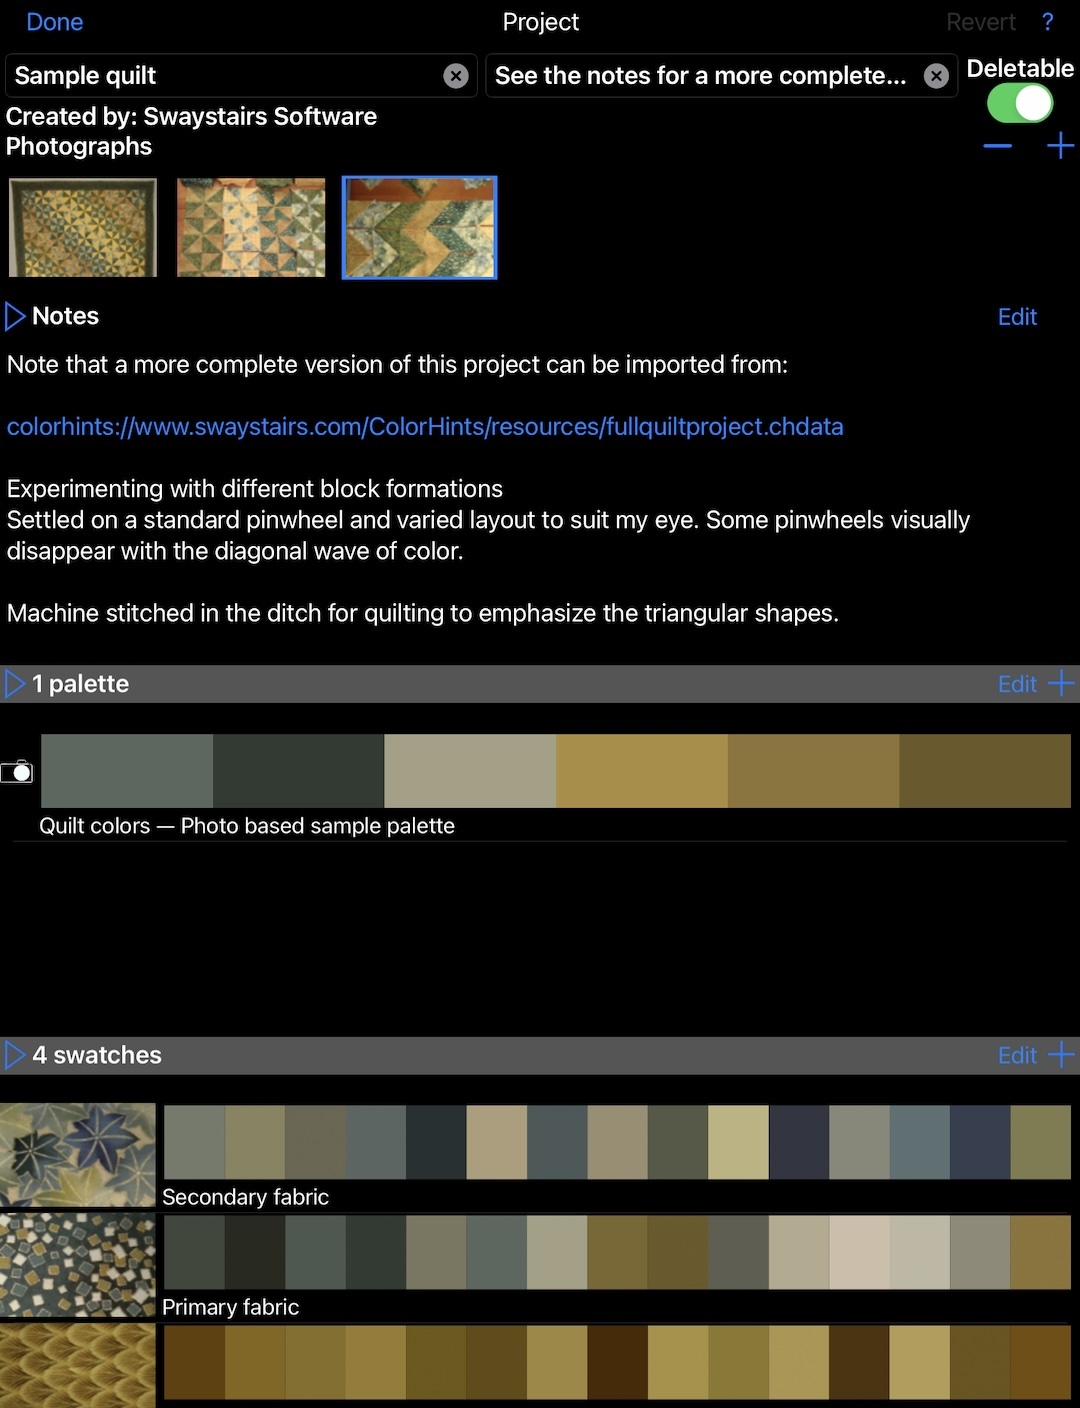
Each Project can have a name and comment. These are not required, but may be helpful in remembering the purpose of each Project.
Photographs
Photographs can be added by tapping the + on the right above the photograph thumbnails. Photographs can be added from
- the photo roll
- photographs previously taken in Color Hints
- a photograph found on the web
- taking a new photograph
- or, taking a series of new photographs
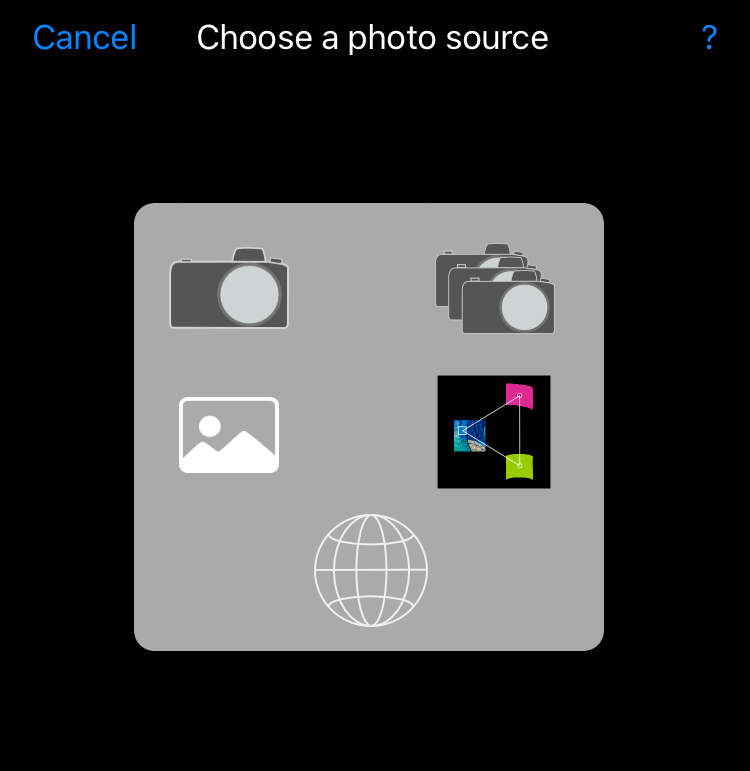
Selecting a source for a Project photograph
The first photograph is shown in the Projects tab with each Project. The order of the photographs can be changed by cutting and pasting the photographs. Use a tap and hold gesture to initiate cut and paste. Photographs can be deleted by cutting them and never pasting them.
Double tapping a photograph will display a large version of the photograph. Pinch gestures can be used to zoom in or out on the photograph. Dragging will pan the photograph if it zoomed to a level that cannot all be displayed on the screen.
Notes
Notes can be edited by clicking on the Edit button on the right side above the notes. When this button is tapped, the notes will expand to cover most of the screen. Tap the Done when editing is complete. Taping the Notes on the left above the notes will expand the notes downward to allow more of the notes to be seen. Tap Notes again to collapse the notes to their original size.
Palettes
Add Palettes by tapping the + above and to right of the Palettes section. Choose from your existing Palettes. Tap the Edit button remove Palettes or rearrange their order. Tap the Edit button to finish editing. Tapping the Palettes button above and to the left of the Palettes will expand the display of the Palettes. Tap the Palettes button again to collapse to the original size.
Swatches
Add Swatches by tapping the + above and to right of the Swatches section. Choose from your existing Swatches. Tap the Edit button remove Swatches or rearrange their order. Tap the Edit button to finish editing. Tapping the Swatches button above and to the left of the Swatches will expand the display of the Swatches. Tap the Swatches button again to collapse to the original size.
Rearranging and deleting Projects in the Project tab
The Edit button in the tool bar of the Projects tab allows Projects to be deleted, their order rearranged, or edited (click the  button). Click the Done button when finished editing.
When a Project Collection is deleted, a confirmation is required that will indicate how many Projects will be deleted with the collection.
Sharing Projects
Select a Project to share by tapping the Project. With a Project selected, tap the action button  . The choices available will depend on which services are configured on your device. Possible choices include
- Facebook
- Twitter
- Message
- EMail
- Weibo
- Copy to paste in another app
Note: the information contained in a Project may be large enough that some of the sharing choices may not be available.
Short cuts
- Double tapping a Project will edit the Project
- A right to left drag gesture on a Project will initiate a delete
- A tap and hold on a color of a Swatch or Palette of a Project will display a large version of that color along with the RGB (Red, Green, Blue) and CMYK (Cyan, Magenta, Yellow, black) values for the color.
- Double tapping a Swatch within a Project will display all of the colors found in the photograph.